Zoom Plugin for Microsoft Outlook WebClient Setup Instructions
This document outlines the steps for installing and configuring the Zoom Plugin for Microsoft O365 web client.
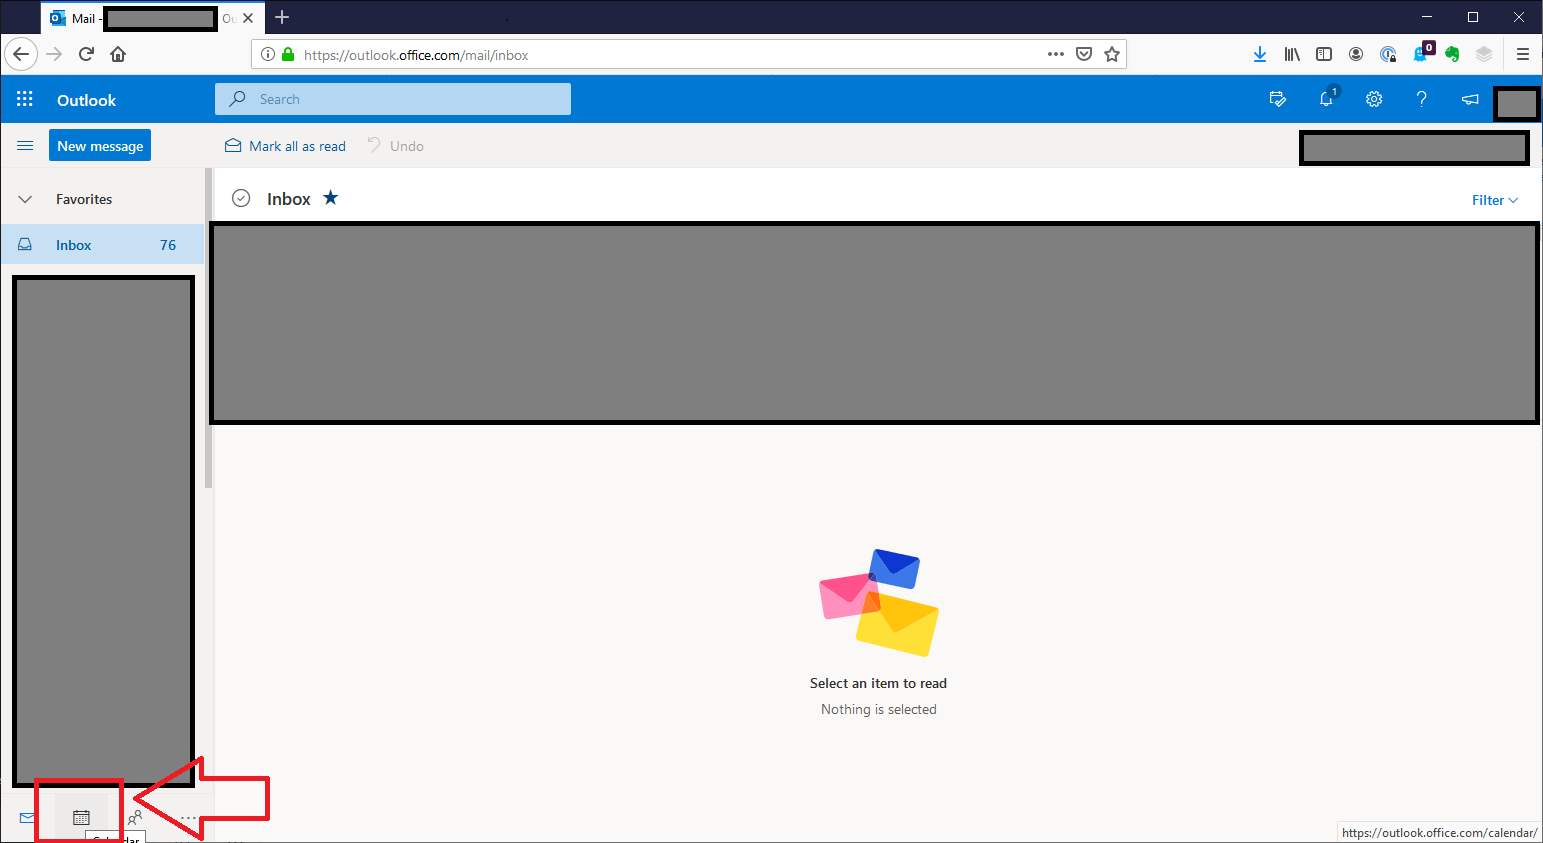
Step 1: Access the Web Outlook Client by following your regular steps.
Step 2: In the Outlook Web Client, switch to the calendar view.
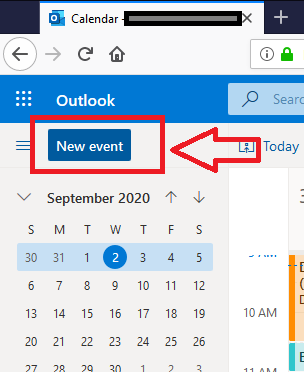
Step 3: In the upper left corner, click the “New Event” button located above the monthly calendar view.
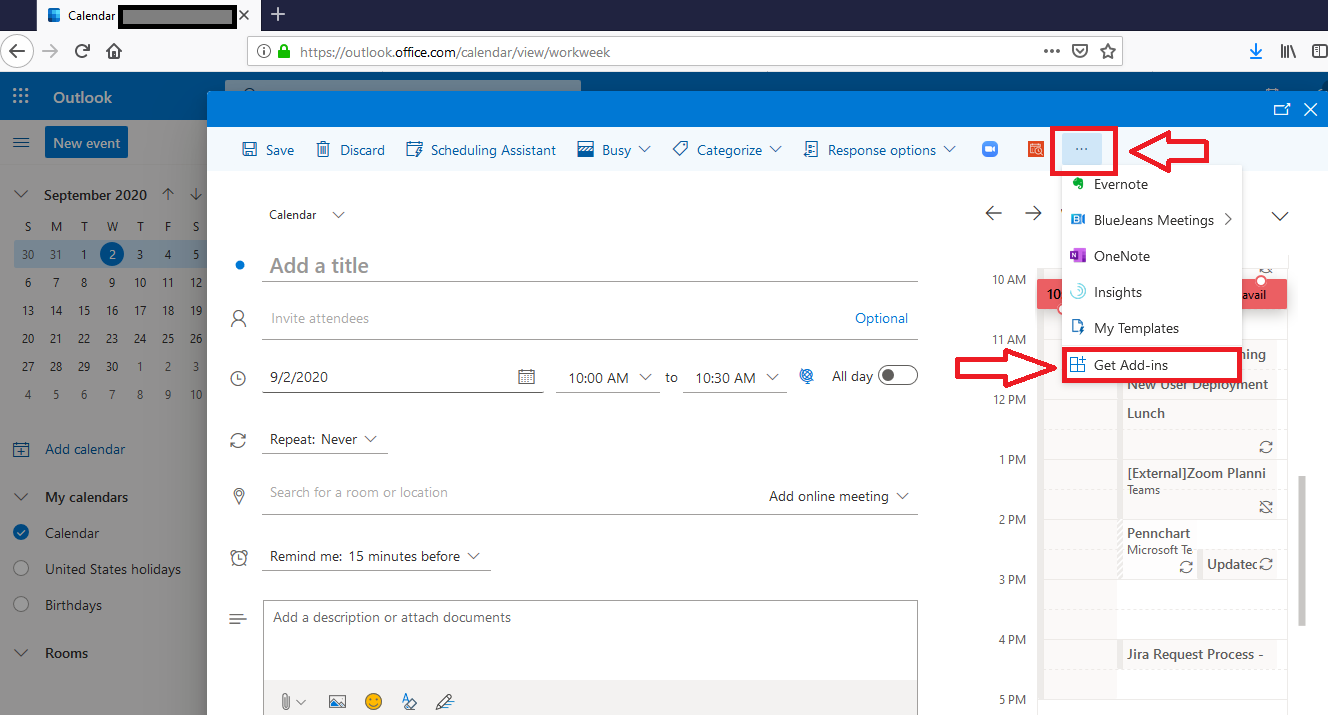
Step 4: A new meeting invite window will appear. Across the top menu of the meeting invite window, locate the “…” option all the way to the right. Click the “…”, then click “Get Add-ins”.
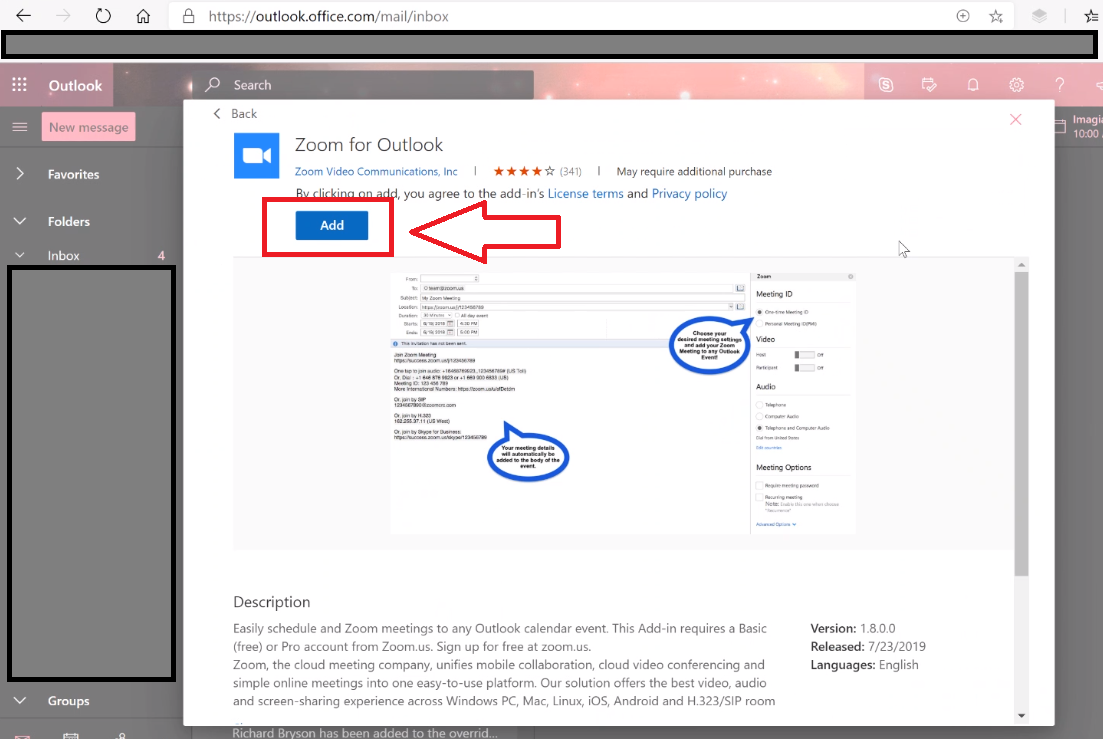
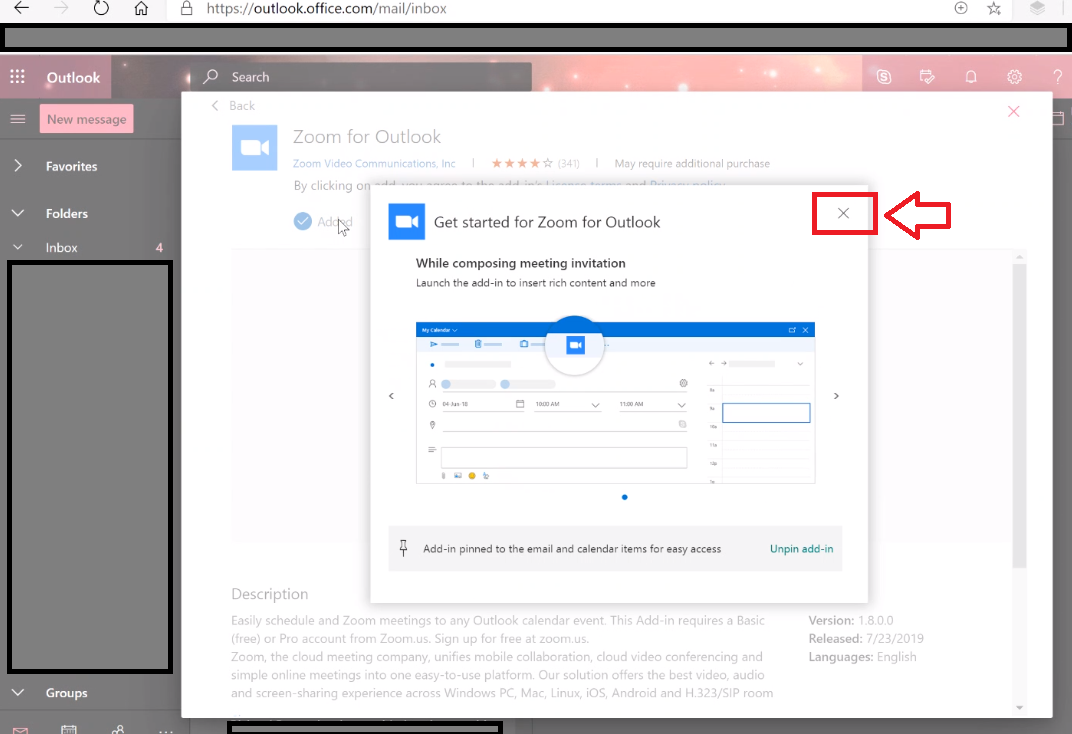
Step 5: The “Add-ins for Outlook” window will appear. In the search box, type “Zoom”. Then select “Zoom for Outlook”.

Step 6: A screen with more details on the Zoom add-in will appear. Click the “Add” button to confirm you want to add Zoom to your Outlook client.
Step 7: Click the “X” to close the window. Click “X” again to close the “Manage Add-ins” window.
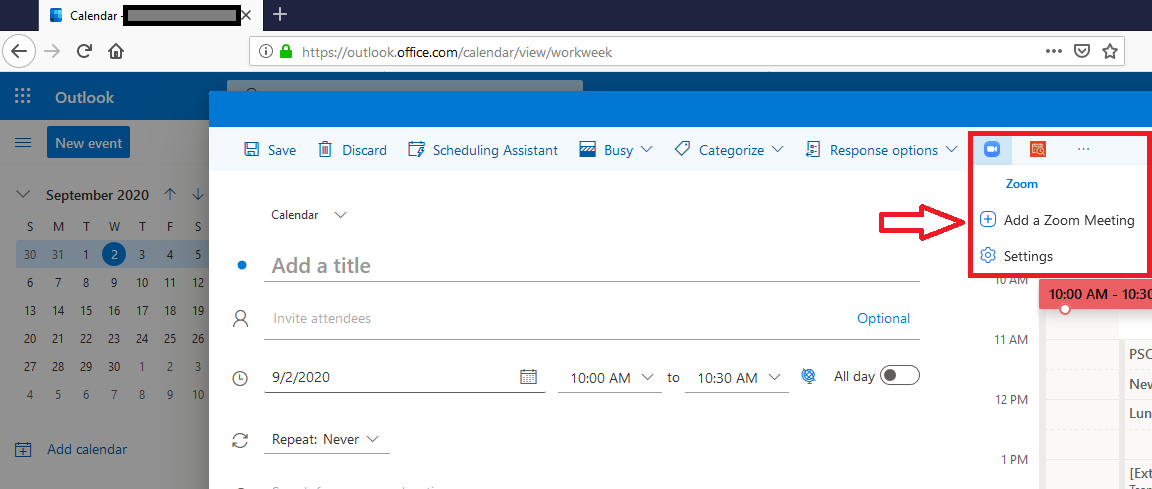
Step 8: The menu bar across the top of the meeting invite will now have a Zoom icon. Click the Zoom icon to see the option to add a Zoom meeting to your meeting invite.
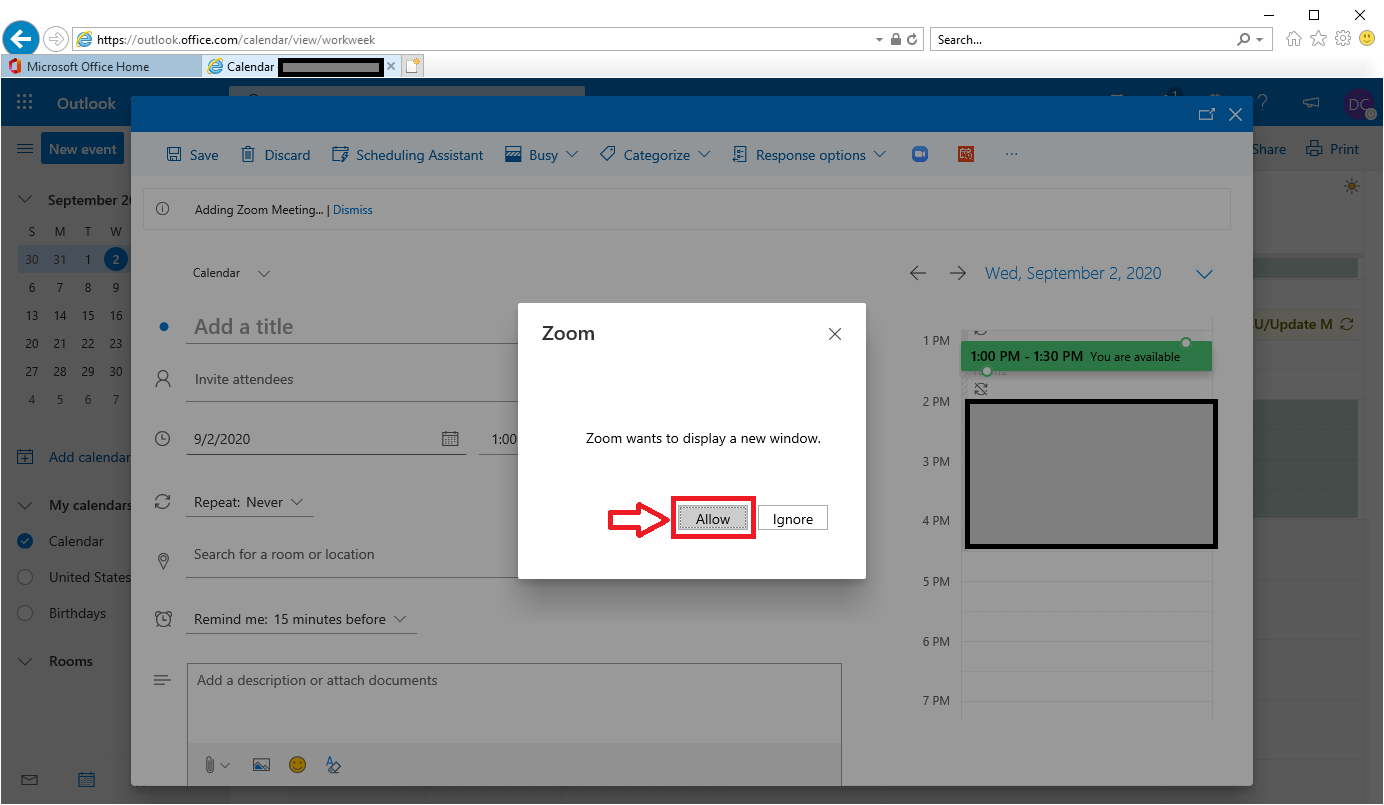
Step 9: You may receive a message stating “Zoom wants to display a new window.” If you do, click “Allow”.
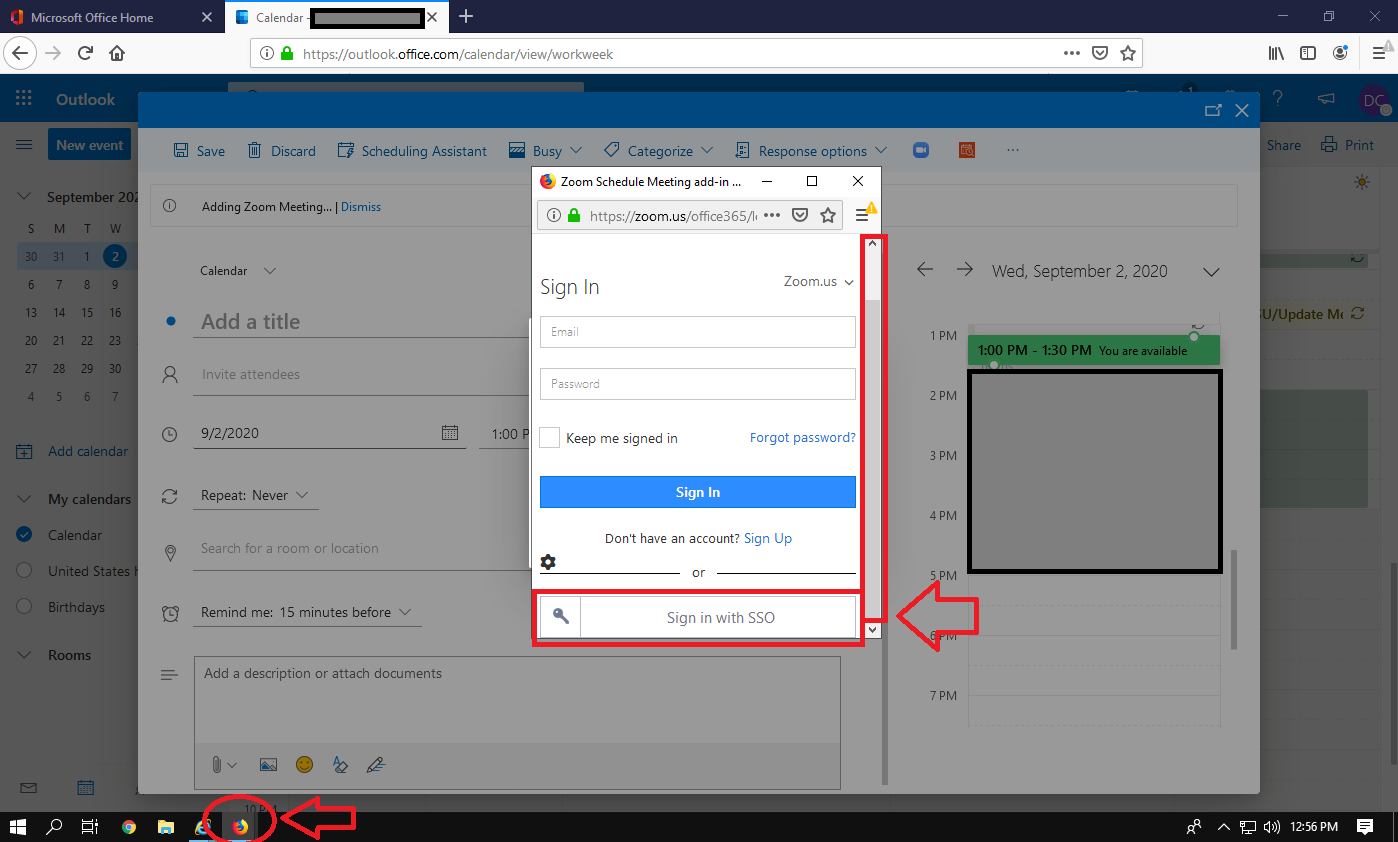
Step 10: A small web browser window will pop up. Scroll down in the window to find the “Sign in with SSO” option. Then click “Sign in with SSO”.
Note: If you do not see a browser window appear, check to see if the window is hidden behind your open browser. You can use ALT-TAB to scroll through open programs, click the web browser icon in the bar at the bottom of the screen, or minimize the current browser window.
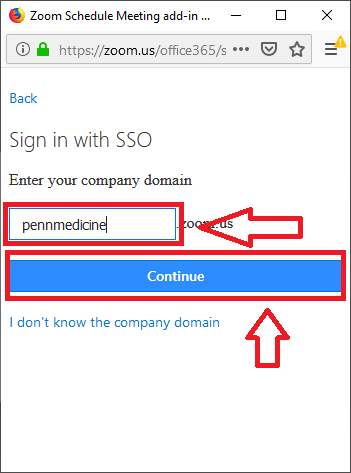
Step 11: In the company domain text box, enter “pennmedicine”. Then click “Continue”.
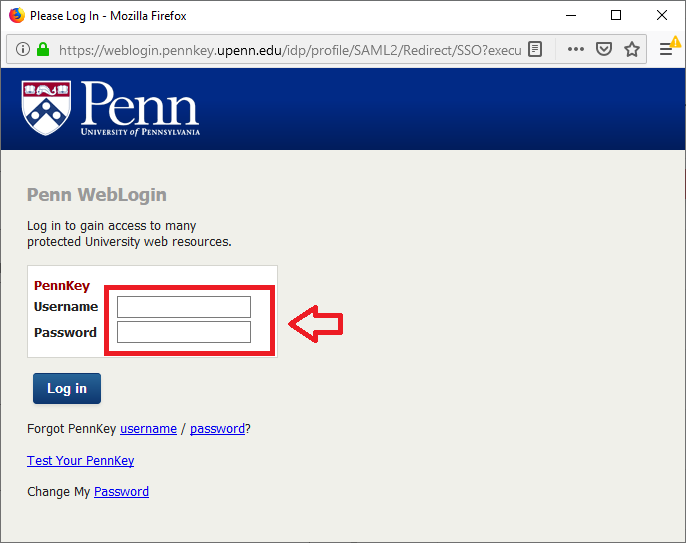
Step 12: The PennKey login page will appear. Follow the PennKey login process.
Step 13: Your Zoom meeting link will populate automatically in the meeting invite.

Congratulations! You have successfully installed and configured the Zoom Plugin for Microsoft O365 web client.